Week 5 Nights 1–2 · Chapter 5
Parallel circuits: student lab guide
All 27 student slides. Night 1: Labs 1–3, slides 1–14. Night 2: Labs 4–6, slides 15–27. Try each schematic before the breadboard. For inputs and calculation checks, open the Week 5 circuit challenges below.
Start Night 1 activities → · Start Night 2 activities →
Use only the instructor-approved 3 V (2×AAA) pack. Disconnect it before rewiring or changing meter connections. Pause for instructor checks.
Slide 1 of 27
LAB 1 STEP 1 OF 5 SCHEMATIC FIRST
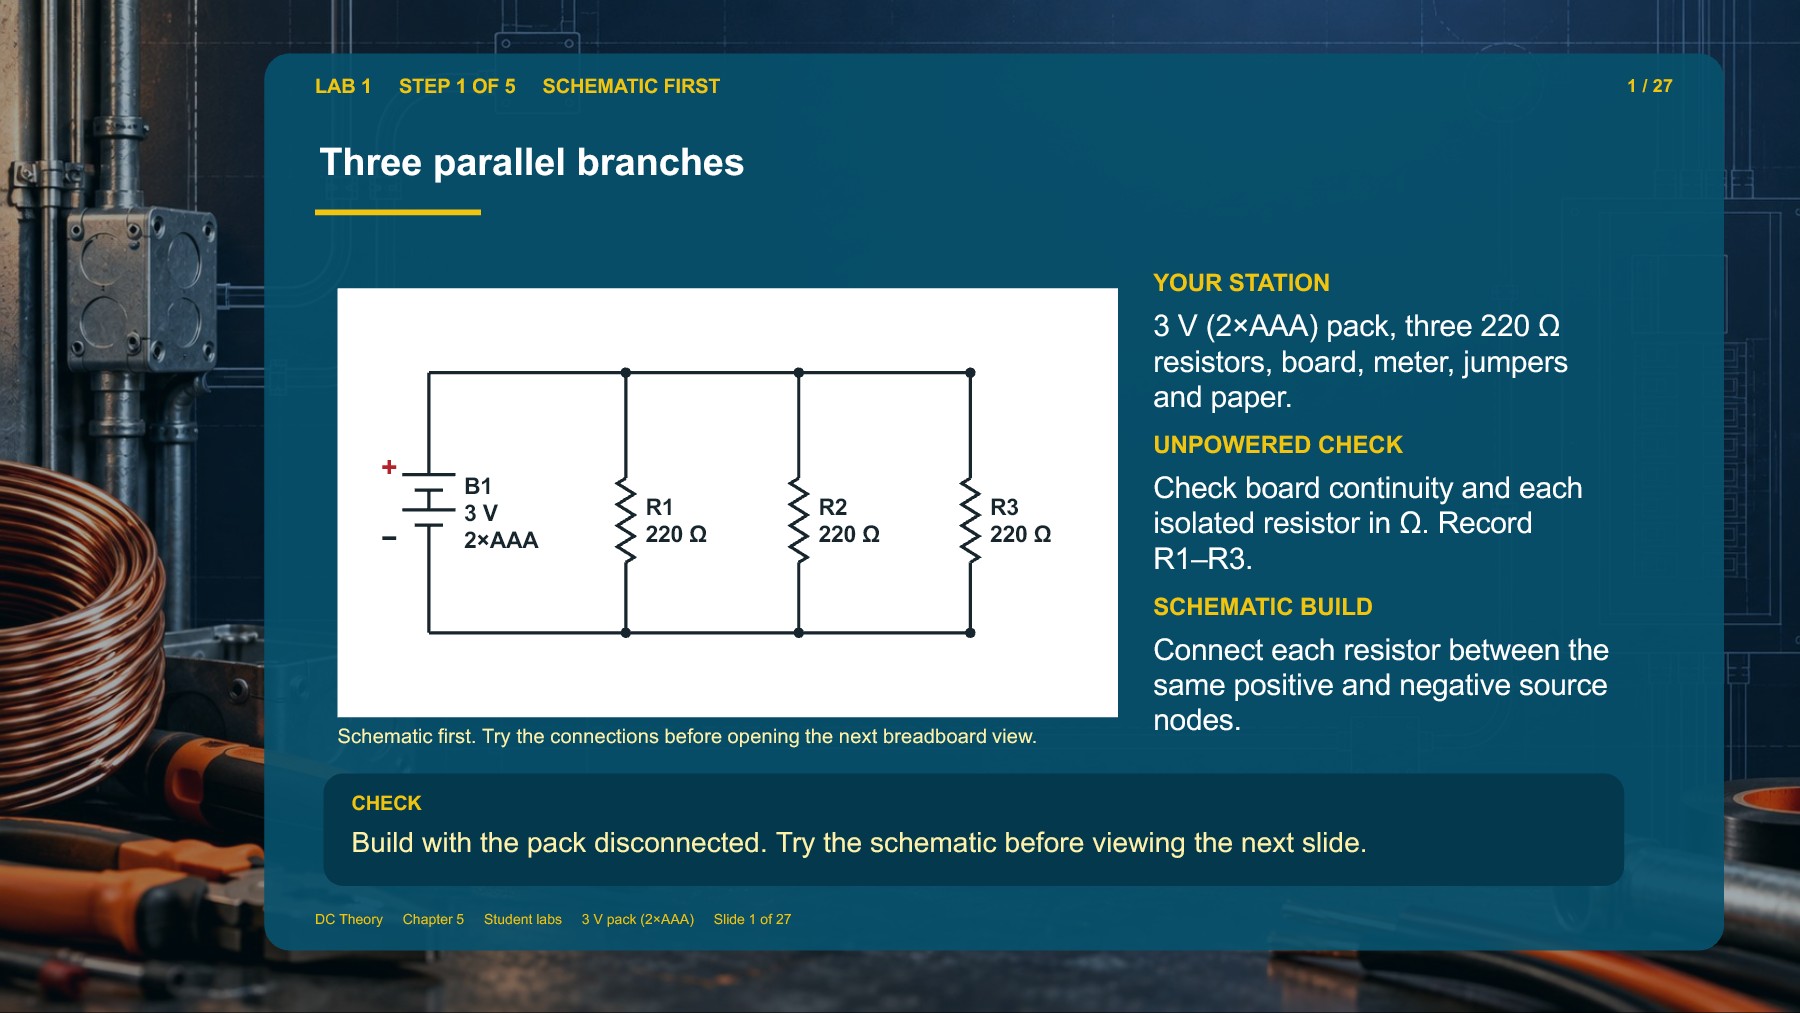
Three parallel branches
Read slide text and tables
Schematic first. Try the connections before opening the next breadboard view.
YOUR STATION
3 V (2×AAA) pack, three 220 Ω resistors, board, meter, jumpers and paper.
UNPOWERED CHECK
Check board continuity and each isolated resistor in Ω. Record R1–R3.
SCHEMATIC BUILD
Connect each resistor between the same positive and negative source nodes.
CHECK
Build with the pack disconnected. Try the schematic before viewing the next slide.
+
−
B1 3 V 2×AAA
R1 220 Ω
R2 220 Ω
R3 220 Ω